Friday, October 14, 2011

Then there were 2

Then there were 2...No we aren't having another baby, Carson has 2 teeth!!!


Non-stop drooling, chewing, and did I mention drooling? He was sleeping all night long, 8-10 hours at a time until the tooth fairy arrived! Boy was that a stressful couple of weeks for us. Down at 8PM, up at 2AM, 4AM, 6AM and cranky!!! Poor little guy has had more Baby Motrin and Tylenol pumped through him in the last month, than I have had in 5 years.

Those pearly whites are now poked through and he a much happier baby. 5 Month check up went great! 17.8 pounds and 23 1/2 inches tall. Here are some updated pics of little man!

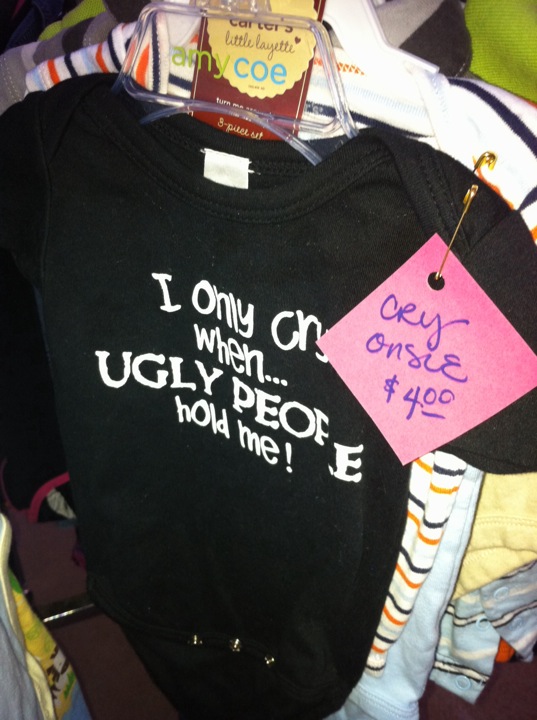
Little Terror- perfect for a teething baby!


I love hanging out in my kangaroo pouch!


Yum Yum! Cereal


I love to chew on my hand!


Helping Mommy at work!


My 1st OU/Texas game with Mom and Dad at the lake


Mom likes to dress me up like a little man, check out my cool jeans my uncle Matt got me!


Playing in my Wonder Bug at Mom's office!


Have a happy Friday!!!

XOXO

Thursday, October 13, 2011

Organized Garage!!!

After a super successful garage sale, it was time to clean the garage!! If there is one thing that my hubby hates more than anything is me cluttering up his "man space". It is a really bad habit of mine to just drop my stuff in the garage on the way into the house and then there it sits.... sometimes for days weeks.

I am an insurance sales lady by day and an organizer by night! I love to stack, arrange, and label everything! For those of you who have ever been to our lake house, you know the labeling part it true!! :)

Since our garage sale, http://thefrenchtulip.blogspot.com/2011/10/garage-sale.html we have been needing to tidy up and organize the garage. We started by lining up all the power equipment under the work benches. They are so bulky, this was the best place to store them.


Then came the peg board! With help of Tanner, we hung 1x2's behind the peg board (on each edge) directly into the studs as anchors. Then we screwed the peg board into the anchors. This step is a must for 2 reasons:
1) the studs will hold the weight of the items you hang on the peg board
and most importantly
2) the 1 inch gap between the wall and the peg board allows you to "peg" your hooks into the holes with ease!

If you hang a peg board over a work bench like us, I suggest you raise it off the bench a few inches (we did 3 inches). This will make cleaning your work space easier and you can hang items on the lower pegs and get full use of the board.


I tried to evenly space out the items and hang them in order of importance. Tanner laughed at me during this process, but if I am going to organize... do it an eye appealing manner! :) The paper towels, scissors, tape, and some of the tools in my reach(cause I'm short). The locks, saws, and guy stuff near the top.

Then came the fun part, LABELS!!!!


I organized the shelves on this side of the garage with like items. All the cleaners in one tote. The lubes, degreasers, and guy gooey in another. Car care got its own bucket and outdoor light bulbs did too. Faucet covers now have their own spot as well as Tanner's toy boat. I bought hang tags from the Office Supply store and labeled with a black marker. I write the info on both sides in case the tags get flipped around. I use store bought tags becasue they are sturdier than homemade ones.

Now if we can just get everything back to its designated spot when not in use, I will be a happy wifey. I am making a promise to Tanner to NOT clutter his "man space" with my junk, then he will be a happy hubby!! Hopefully our garage will stay organized and clean forever!

XOXO

Garage Sale


What a busy couple of weeks we have had! Since we moved into the new house a year ago last month, we finally decided it was time to sell some of our "non-usables" in a garage sale. If you have never had a garage sale, let me tell you... it is a chore to get ready! I have had many over the years and I tend to think I have it down to an art!

PRICING:
First, I have been collecting items since the move. I price every item as I put it in the GARAGE SALE box. (This makes it TONS faster on you when you decide to have a sale). I use bright neon stickers for most items and then on clothing and hard to sticker items I make hang tags.

**How to make a cheap hang tag**
Use brightly colored paper (I use scraps of old scrapbook paper) punch a hole in the corner, write the item description and the price, and hang with some curly ribbon or on clothing I use a safety pin.


You ask why I write the description on it?? Well, after many successful sales, I have found people to change prices on items. I know, I know, it's just a garage sale, but why would I want to get $4 for a Coach purse that I had marked $50. Also, I think it extremely important to have every item priced. Nothing is worse than a non-priced item. I also don't like the "make me an offer" gimmick. I don't want to insult someone nor do I want to under price something that someone would have paid more for or vise-versa.

GATHERING:
We, meaning the hubby and I, started working on the sale 3 weeks prior to our big sale day. We would scour the house and garage for items to sell, price it and set it out in the garage.


We hung clothes on the rack as we priced them


Look at all the goodies we gathered!


My "work station" Everything was priced and inspected here. I made sure to fix any broken items, or insure that they worked via batteries or plug.


SET-UP:
I divided all of our items into like categories. All the kitchen items on one table, Christmas on another, household goods on one, baby on another, etc. It was like browsing at a store!! This makes it much easier to find something when someone asks if you have a specific item.

I staged the garage with the tables set up the night before the sale. When Friday morning rolled all we had to do was roll out the tables and place everything on the driveway.


Baby table


Notice the blankets and sheets in the background? We did this to hide our stuff that wasn't for sale.


See the sign in the background? We attached flags to it, to blow in the wind, as if all the stuff on the driveway wasn't a big enough eye catcher!! :)


We even had a 4 wheeler for sale!


More clothes on the much used racks


We had a display case for the sunglasses and we also had it for sale!


The overall display of our items


DATE AND TIME:
We chose a gorgeous fall day for our sale and made sure that our State football team (OU Sooners) played a night game on Saturday and that it wasn't the same time as our Sate Fair. Both of these events would have put a damper on things. We opened the doors at 7AM and closed them around 6PM each night. We had people non-stop the whole time!

SIGNS:
I don't take a picture of our signs, but I made them on NEON orange poster board and in big letters wrote GARAGE SALE--->
I taped them to some realtor signs that we had laying around. This is much easier than taping signs to a pole, and they stand up high off the ground. Our street intersects with a major city street, so we had LOTS of exposure with our signs.

FYI:
We had so much stuff, I was concerned that we wouldn't be able to sell it all. So, here was my master plan: EVERYTHING that was left at 1PM on Saturday was 1/2 off the marked price!!! I made another sign to put by my original sign... and boy did I open the flood gates! We had people standing in line to pay! We were slinging money and bags full of goodies faster than I ever expected. I will definitely do that again if I have another sale (hopefully not anytime soon!!!)

Overall we had a fabulous sale, we made over $3,500 and got rid of lots of clutter! After the 1/2 off sale, we only had 3 plastic totes of items left! I donated them to Good Will and got my tax slip. It feels good to declutter and make some money at the same time! We were too exhausted by the end of the weekend to clean up and organize the garage, so that was put off until the next weekend. Next blog post will be the new cleaned out garage!

Hopefully you can take a tip or two from me and have a successful garage sale too!!

XOXO-

Tuesday, September 27, 2011

Shauna's painting skills in 5 EASY steps!

I found a unique piece of furniture at my favorite store Breezy's and decided it needed my touch! I couldn't pass up a good deal, $15 for this boring white hunk of wood. What to use it for... Use the shelves, take them out, towel holder in a guest bath, wine rack, the possibilities are endless! I opted for the wine rack. Here's the before and after!


BEFORE: BORING!!!


1) I took out the shelves and sanded the whole piece.

2) I painted the whole thing dark red. If you have ever painted with red paint, you know that it takes numerous coats. The piece went from pink to dark red after 4 coats!

3) I let it dry overnight

4) I then painted the black accent marks. I wanted a distressed wood look. This process is a lot easier than you think! I started with a 2 inch wide DRY paint brush dipped in jet black paint. I lighted painted the top and then wiped the excess off with a damp paper towel. I continued with the shelves and then the overall piece itself. (Whole paint and wipe off process took less than 20 minutes)

5) Let dry and then insert the shelves.


AFTER: Pretty red and black wine rack!


This whole process took less than 3 hours, and was cheap! $15.00 initial investment, and $8.00 in paint. (I already had the sander and the sandpaper on hand). So, for $23.00 I have a great looking wine rack that would have cost LOTS more if I bought already finished. And who is to say that I would have found one that was red and black, and just my style?!?!

Gotta run, time to look for another project!
XOXO

Thursday, September 22, 2011

Tips and Tricks!

Who doesn't love a little tip or a trick to make your day go a little smoother? Well,I have compiled 10 of my favorites for you. Hope you can use one or all of them to solve your problems!


1) Smelly hands from an onion or garlic?


Rub your hands on your stainless steel faucet or over a stainless steel spoon. Rinse with warm water.

2) Rust spots on your hand held can opener?

Use an old toothbrush dipped in apple-cider vinegar to scrub away the rust. Rinse off vinegar and dry (a hairdryer makes this super fast!)

3) Do you have left over rubbery shelf liner?

There are actually numerous uses!
*Place under a rug for a non-slip surface.
*Cut a small sqaure and leave in the untensil drawer to help open those pesky tight lids on your jars.
*Tape a piece to the back of a photo or painting to keep it in place on the wall- the texture grips the wall and doesn't harm it.

4) Stuck zipper?

Rub it with a bar of dry soap

5) Tired of mosquitoes bitting you??

Rub yourself down with a dryer sheet or place one in your pocket while sitting outside to avoid being bit!

6) To remove old wax from a glass candleholder

Put the candleholder in the freezer for a few hours, take out and turn upside down, the wax should fall out! (I have done this numerous times and have saved many of my crystal pieces!)

7) Blood stains on clothes?

Not to worry! Just pour a little hydrogenperoxide on a cloth and proceed to wipe off every drop of blood. Works every time!

8) Streaks on your windows?

Use vertical strokes when washing windows outside and horizontal for inside windows. This way you can tell which side has the streaks. Or hire a housekeeper to do the dirty work for you!!! :)

9) To clean artificial flowers


Pour some salt into a paper bag and add the flowers. Shake vigorously as the salt will absorb all the dust and dirt and leave your artificial flowers looking like new! Works like a charm even on greenery and plants too!

10) Burnt on food in your skillet

Simply add a drop or two of dish soap and enough water to cover bottom of pan, and bring to a boil on stove top. Rub lightly with a scrub brush and dry!

Since I love reading up on and testing out new ticks and tips, I will start posting more on a regular basis. Enjoy and see you soon!
XOXO

Wednesday, September 21, 2011

Rice Krispie Pumpkins!

Just reposting a favorite receipe for my famous pumpkin treats! They are always a huge hit and fun to eat! I like to make mine bite size where you can eat it in 2-3 bites! (Click the title to preview the step by step instructions)


Falling in love with fall

Fall is one of my favorite times of the year... cooler temps, the State Fair, OU football and Halloween! Here are some of the fall crafts that you will see around my house and some some of my favorite decorations!

Halloween Invitations!


Mummy pumpkin
I have also made mummy coozies for our Halloween party. You can mummy just about anything! All you need is a little gauze, some googly eyes and a drop of glue!


Flower pumpkins. You can use the faux pumpkins and flowers for a piece that will last from year to year!


Super cute and simple to make!!! All you need is some paint, paper sacks (which come in all colors), paper plates, some scrap paper, markers, glue, staples and some free time!


I am thinking this for my front porch, but a little smaller scale!


Carve a pumpkin using a drimmel tool! Too easy!!


Happy Fall Ya'll!!